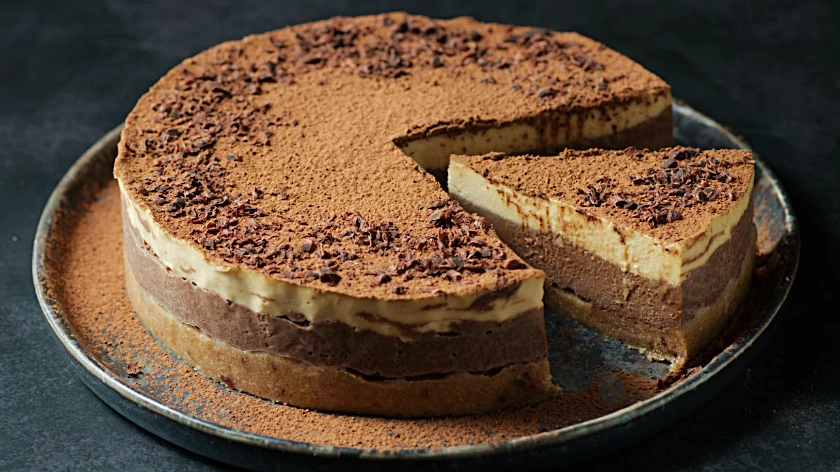
This No Bake Chocolate Cheesecake recipe is simple and easy. This chocolate cheesecake is made without milk, eggs or gelatin. You don’t need an oven to make this vegan, gluten-free dessert. Chocolate cheesecake will decorate your table. The cheesecake recipe contains the most common ingredients.
Chocolate Cheesecake Ingredients
There are two groups of ingredients in the Chocolate Cheesecake recipe. This is the crust and filling of the cheesecake. All products are the most common. They can be used in other recipes as well.
Crust
Today’s cheesecake recipe will feature a date-based crust. Sometimes I make a crust with almond flour and coconut oil. Today’s recipe calls for almond flour, ground rolled oats, Medjool dates and refined coconut oil. Grind Rolled oats in a blender or coffee grinder. Soak dates in hot water before cooking.
Cheesecake filling
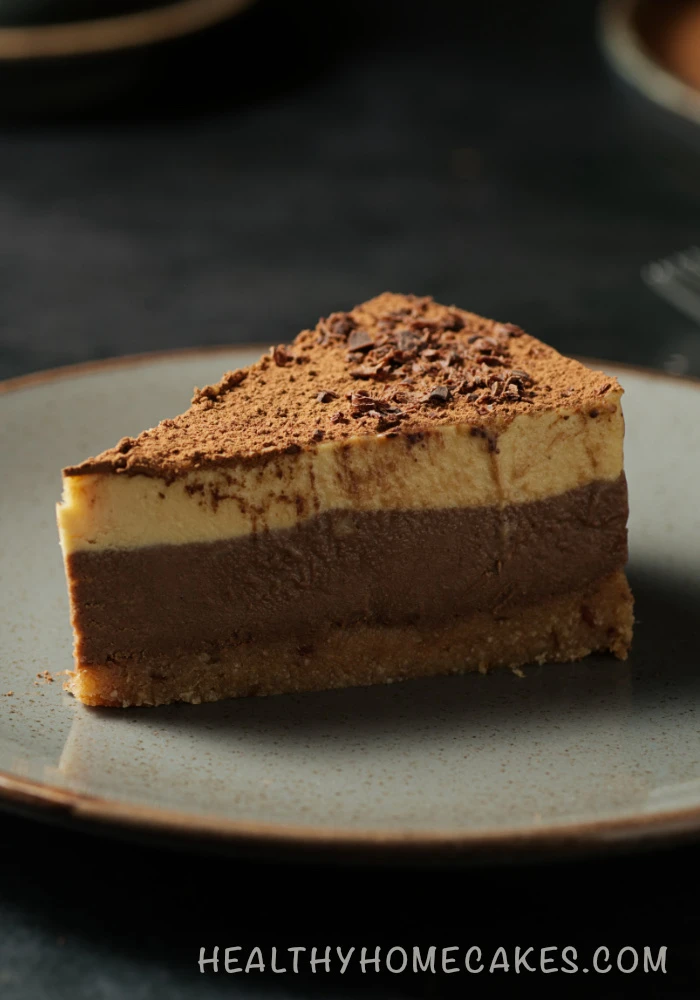
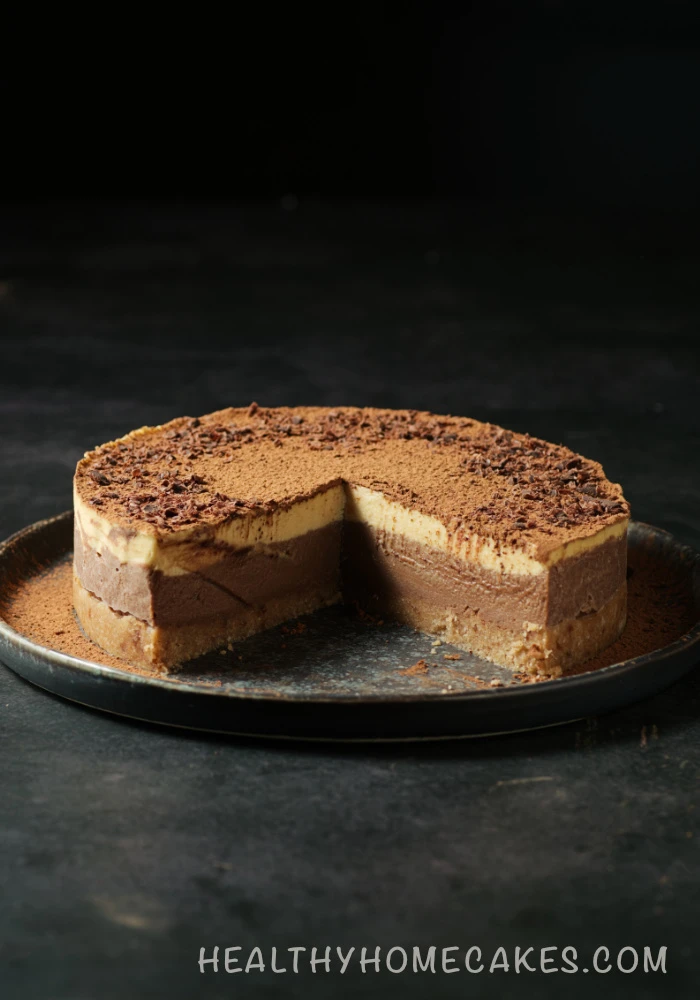
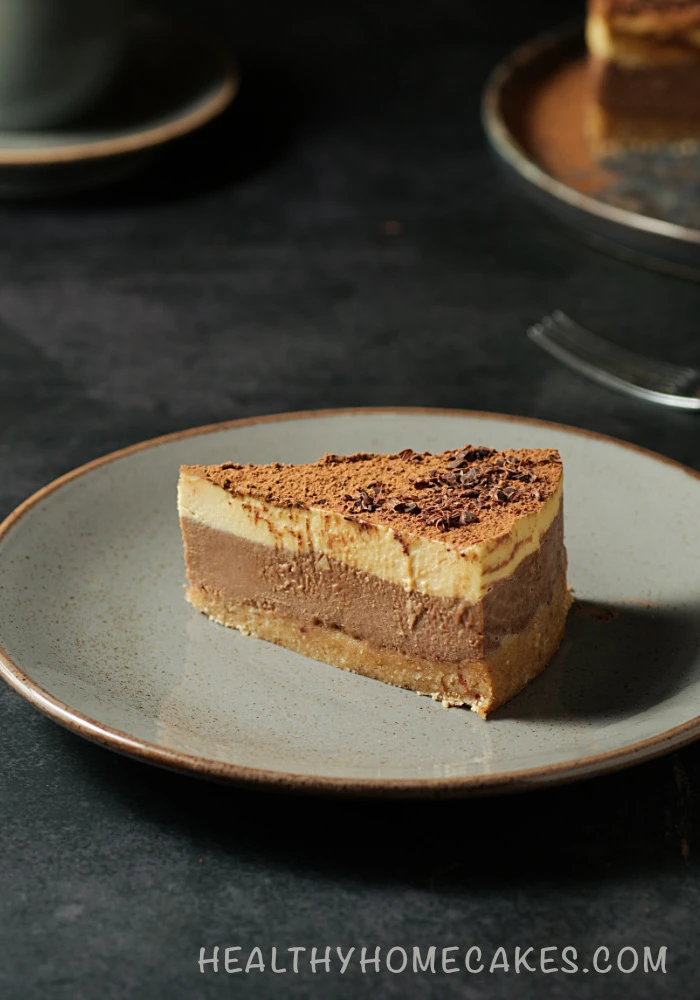
The No Bake Chocolate Cheesecake recipe has two layers of filling. This is a chocolate layer and vanilla. I made two layers to make the cheesecake look more interesting. In principle, you can make one chocolate layer by loading all the ingredients into a blender.
And so what do we need? For the filling you will need soaked cashews, coconut milk, cacao butter, coconut syrup, vanilla extract and cacao powder. Cacao butter can be replaced with coconut oil. Before cooking, soak cashews in cold water for 8 hours or overnight. To prepare the dessert, you also need a 16 cm (6 inches) round pan and parchment paper. Place the parchment on the sides of the pan.
How to make No Bake Chocolate Cheesecake
To make No Bake Chocolate Cheesecake, we start with the crust.
Preparing the crust
First, remove the pits from the dates. Then soak the dates in hot water for 15 minutes to make them softer and easier to peel off. Then remove the skins from the dates.
This is especially true for simple dates. Although I also peel Medjool dates. Next, place the dates in a blender bowl and add refined coconut oil. Grind everything until smooth.
After this, mix almond flour and crushed rolled oats in a bowl. Add dates and butter to the flour mixture. Gather all the ingredients into one lump. Next, place the crust in the pan and smooth it out with a silicone spatula. Place the pan in the freezer for 15 minutes. And start filling.
Preparing the chocolate layer
Place soaked cashews, coconut milk, melted cacao butter, coconut syrup, vanilla extract and cacao powder in a blender jar. Grind everything until smooth. Then spoon the chocolate filling onto the crust and spread evenly across the pan. Place the pan in the freezer for 1 hour. After this time, we will make a vanilla layer.
Vanilla layer
The process for preparing the vanilla layer is the same as for the chocolate layer. Only we won’t add cacao powder. So. Using a blender, puree the soaked cashews, coconut milk, melted cacao butter, coconut syrup and vanilla extract until smooth. Next, place the filling on top of the chocolate layer. Place the pan in the freezer for 1 hour until hardened.
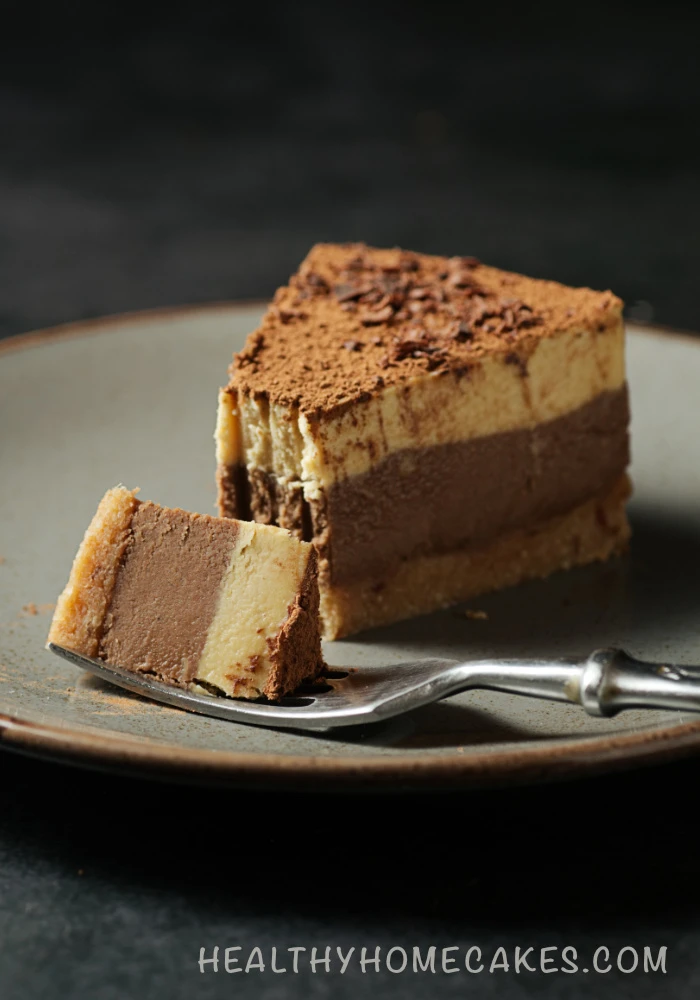
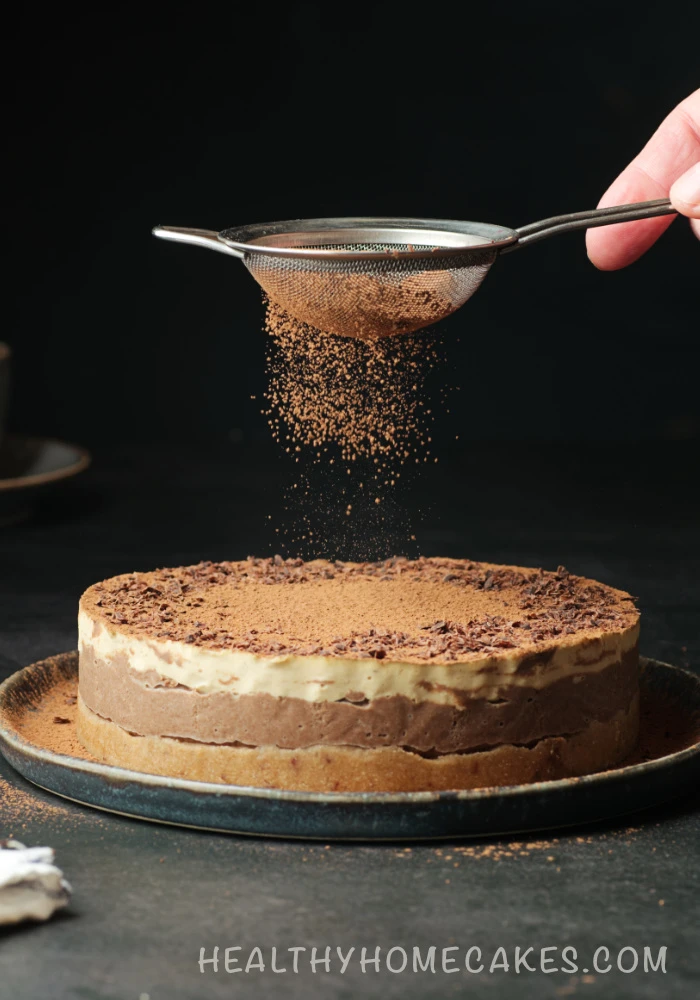
Once set, remove the cheesecake from the pan and sprinkle cocoa powder on top. Lightly heat a knife in warm water before cutting into the cheesecake. Then the cuts on the pieces will be smoother. Store No Bake Chocolate Cheesecake in a tightly sealed container for 3 days in the refrigerator. You can also store the cheesecake in the freezer.
Make Chocolate Cheesecake and write your comments. I’m interested in your opinion.
Enjoy!
Be healthy and love yourself!

No Bake Chocolate Cheesecake (Vegan | Gluten-Free)
Course: Gluten free8
servings30
minutes2
hours30
minutes491
kcalIngredients
- For the crust
2/3 cup (70g / 2.5oz) rolled oats gluten-free, crushed
1/2 cup (50g / 1.7oz) almond flour
3 tablespoons refined coconut oil, melted
5 pieces (100g / 3.5oz) pitted Medjool dates
Filling- Chocolate layer
4/5 cup (120g / 4.2oz) cashews, soaked
1/3 cup (80g / 2.8oz) cacao butter, melted
1/3 cup (80g / 2.8oz) coconut milk
3 tablespoons coconut syrup
1 teaspoon vanilla extract
2 tablespoons (20g / 0.7oz) cacao powder
- Vanilla layer
1/2 cup (75g / 2.6oz) cashews, soaked
1/5 cup (50g / 1.8oz) cacao butter, melted
1/5 cup (50g / 1.8oz) coconut milk
1.5 tablespoons coconut syrup
1 teaspoon vanilla extract
Instructions
- Crust
- Remove the pits from the dates. Soak the dates in hot water for 15 minutes. Peel the dates.
- In a blender, combine Medjool dates and refined coconut oil.
- In a bowl, mix almond flour with crushed rolled oats. Add date paste. Gather all the ingredients into one lump.
- Place the crust mixture in a parchment-lined pan. Use a silicone spatula to spread the crust over the pan.
- Place the pan with the crust in the freezer for 15 minutes
- Filling
- Chocolate layer
- In a blender, puree soaked cashews, coconut milk, melted cacao butter, coconut syrup, vanilla extract and cacao powder.
- Pour the chocolate filling onto the crust and spread evenly into the pan. Place the mold in the freezer for 1 hour.
- Vanilla layer
- Using a blender, combine soaked cashews, coconut milk, melted cacao butter, coconut syrup and vanilla extract.
- Pour vanilla filling over the chocolate layer. Place the mold in the freezer for 1 hour until hardened.
- Remove the cheesecake from the pan and sprinkle cacao powder on top.
Recipe Video
Notes
- Cup 250 ml, tablespoon 10 ml, 1 teaspoon 5 ml.
- Round form 16 cm (6 inches) and parchment.
- Soak cashew nuts for 8 hours or overnight before cooking. Change the water periodically.
- Store Vegan Chocolate Cheesecake in a tightly sealed container in the refrigerator for up to 3 days. For longer storage, put the dessert in the freezer.